3. Set up the Admin Panel
A step-by-step onboarding guide for new users who just received their credentials. By the end you will have an application configured, a Docker image tag loaded, and a container started to verify everything is working.
In production, session starts happen through the API — starting a container from the Admin Panel is useful for testing and debugging, but is not intended for continuous use.
Estimated time: 10–15 minutes.
For detailed reference on every page and feature, see the User Manual.
Prerequisites
Section titled “Prerequisites”Before you begin, make sure the following are in place:
- Docker Hub setup complete — You have finished Set up Docker Hub and Create and push your Dockerfile (steps 1–2 of this guide).
- Gameye Admin credentials — You need an email and password for the admin panel. Your administrator will provide these.
Once both are ready, you’re good to go.
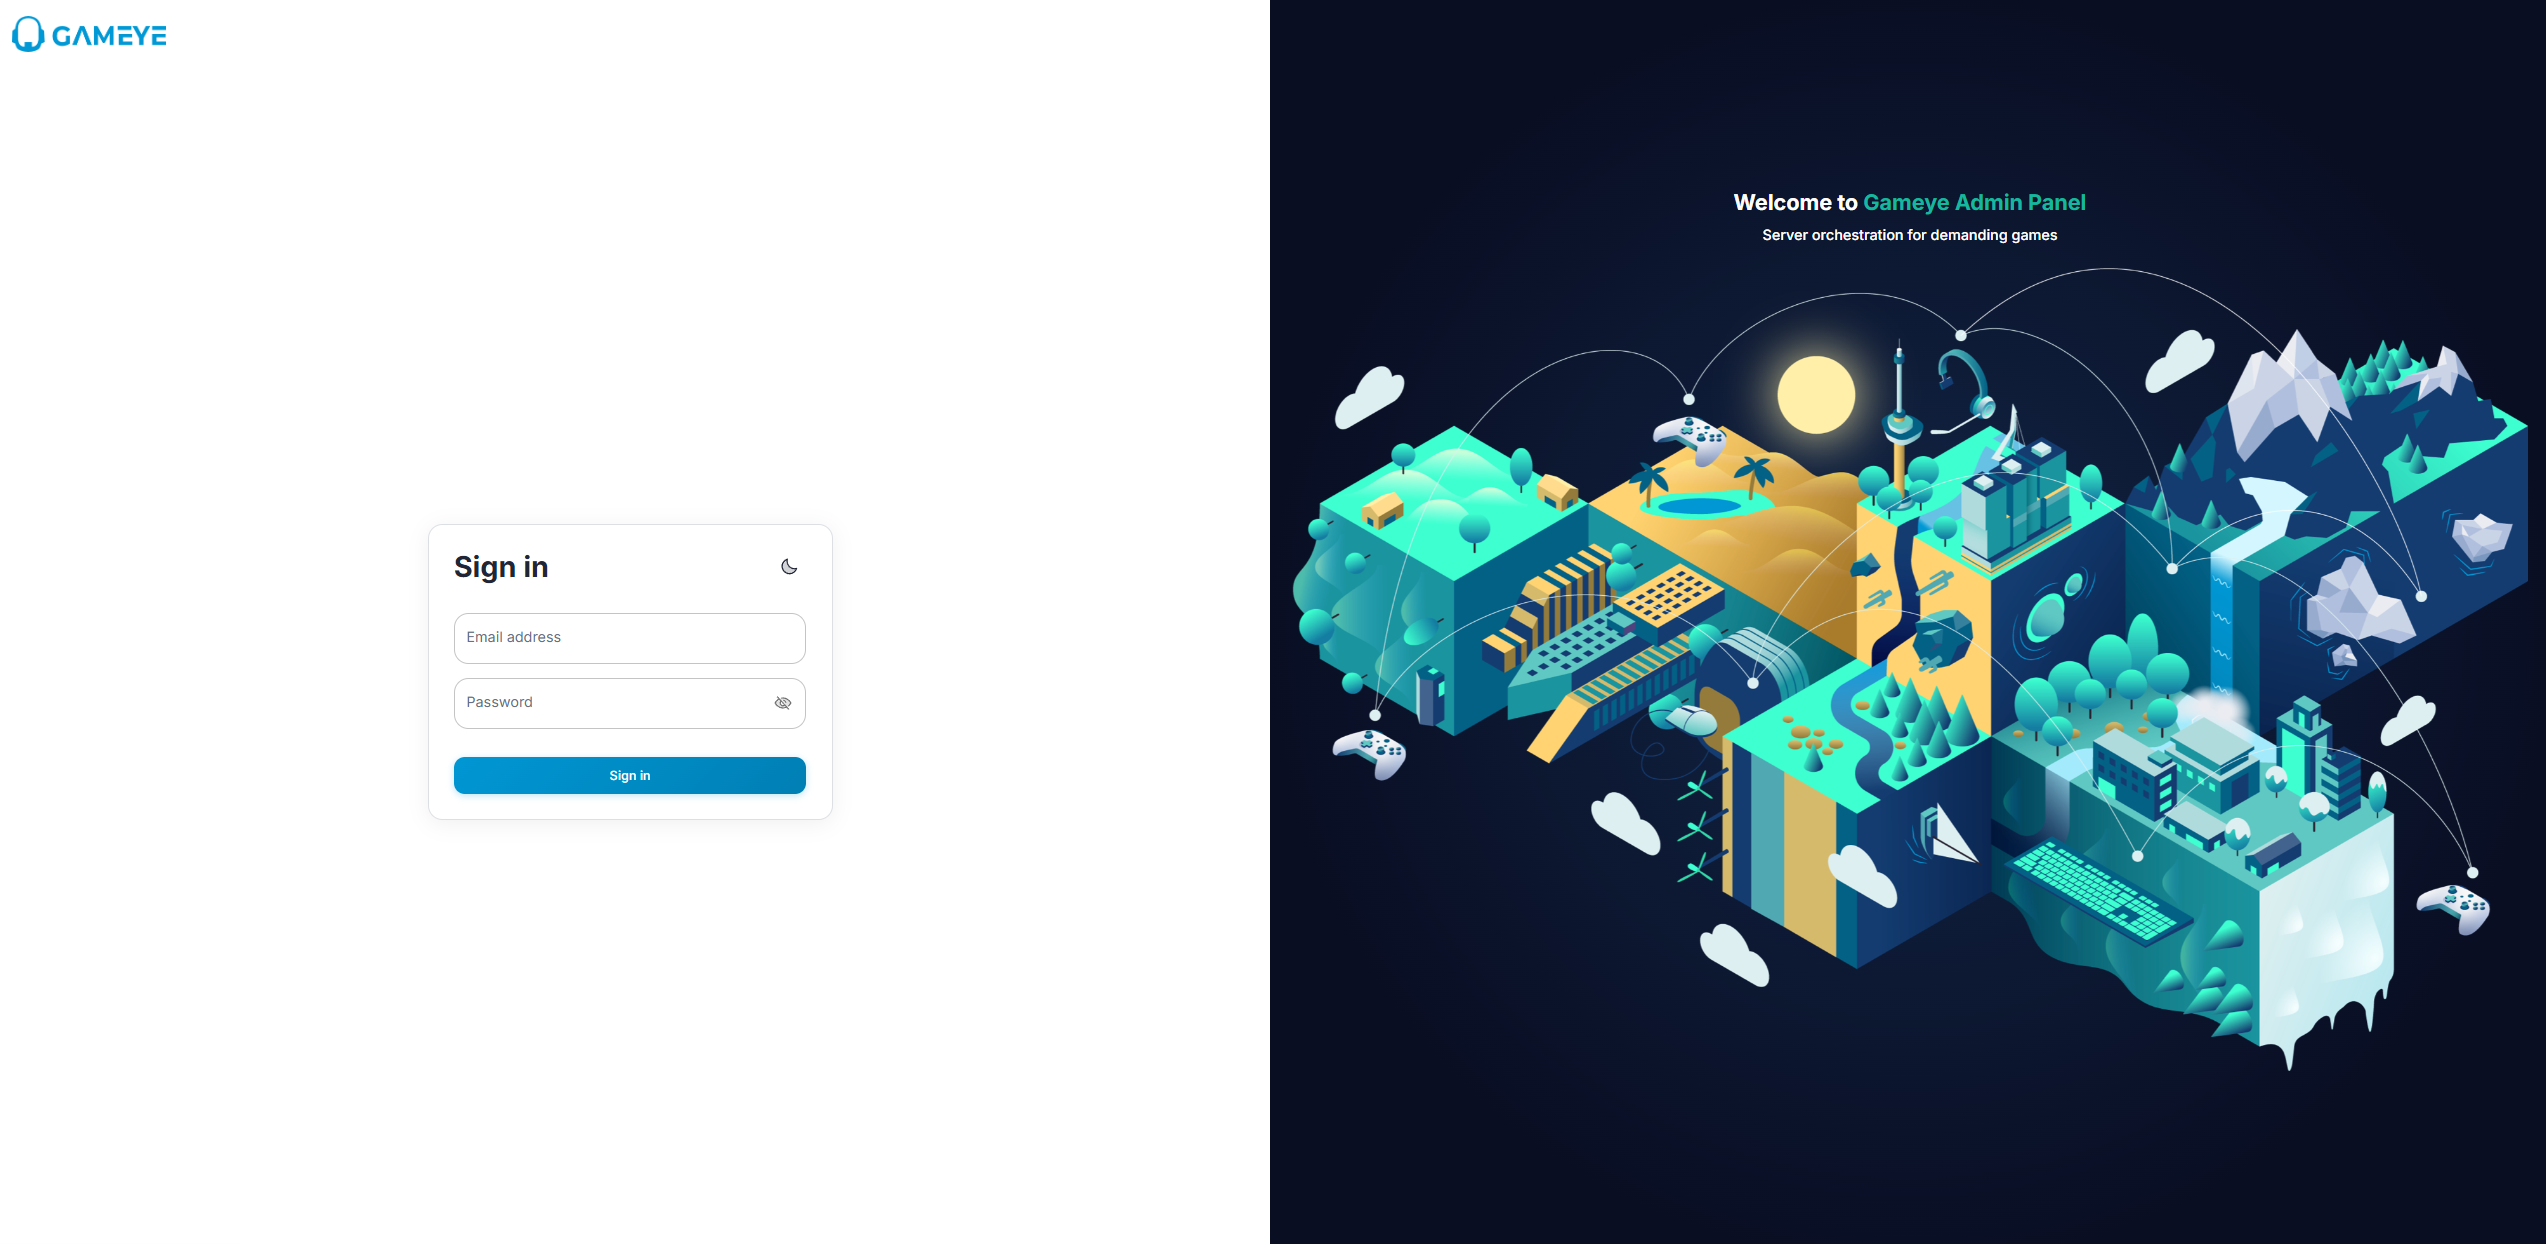
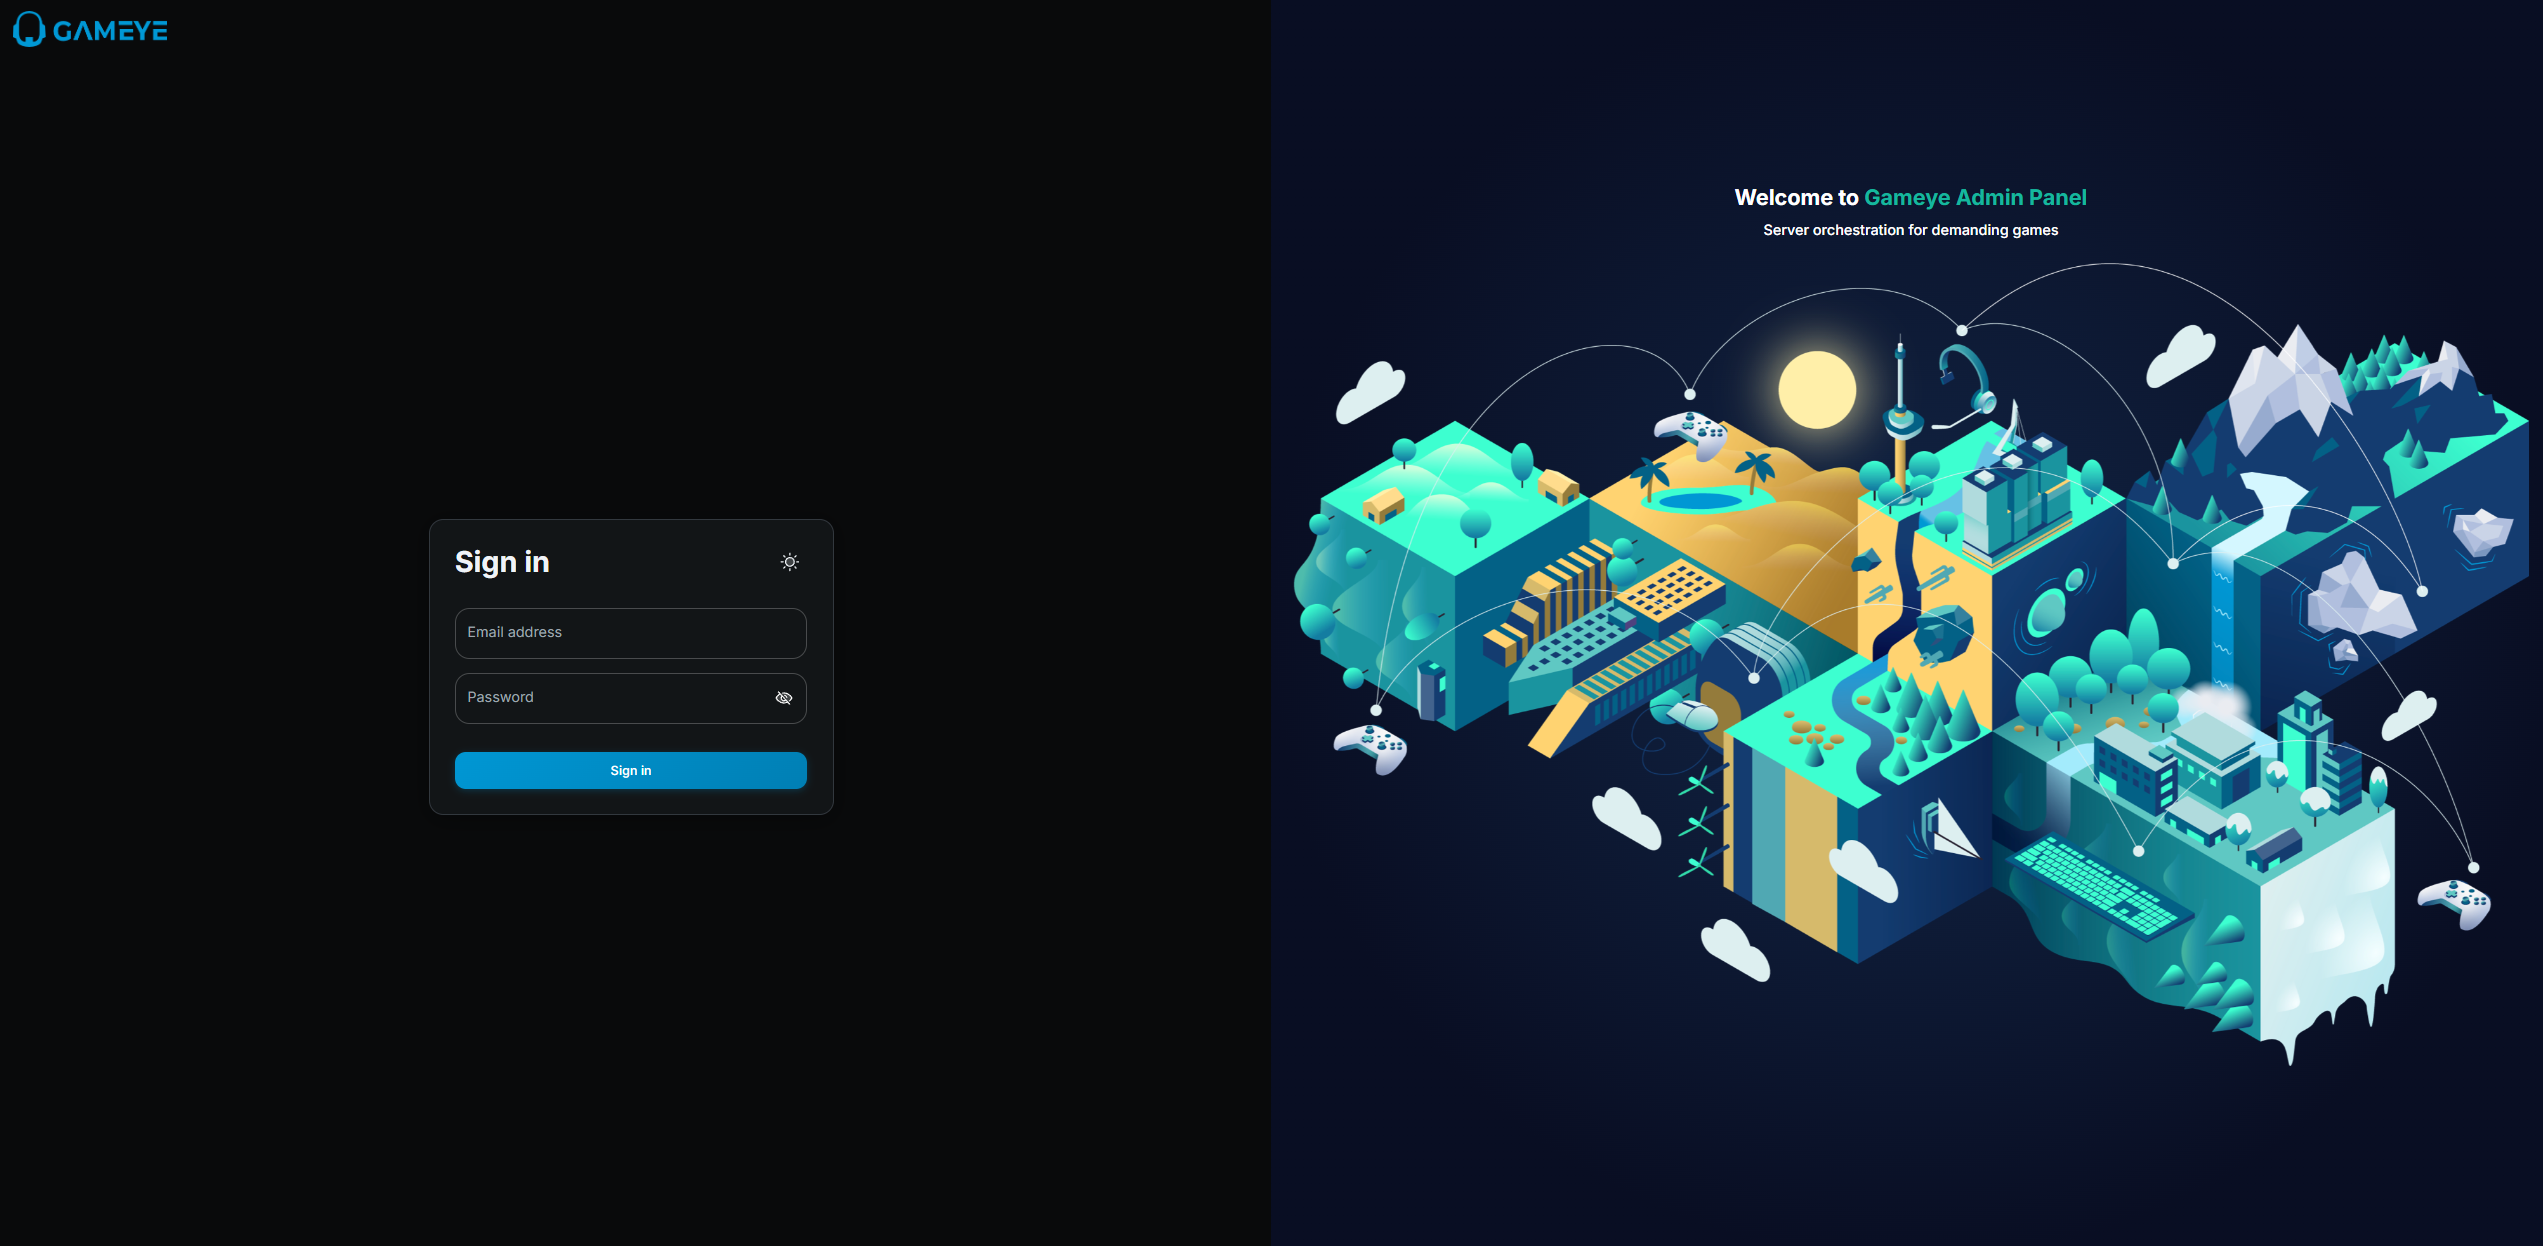
Step 1 — Sign in
Section titled “Step 1 — Sign in”- Open the Gameye Admin URL provided by your team.
- Enter your email and password.
- Click Sign in.
You land on the Dashboard. If you see an empty dashboard, don’t worry — you haven’t created any applications or started any containers yet.
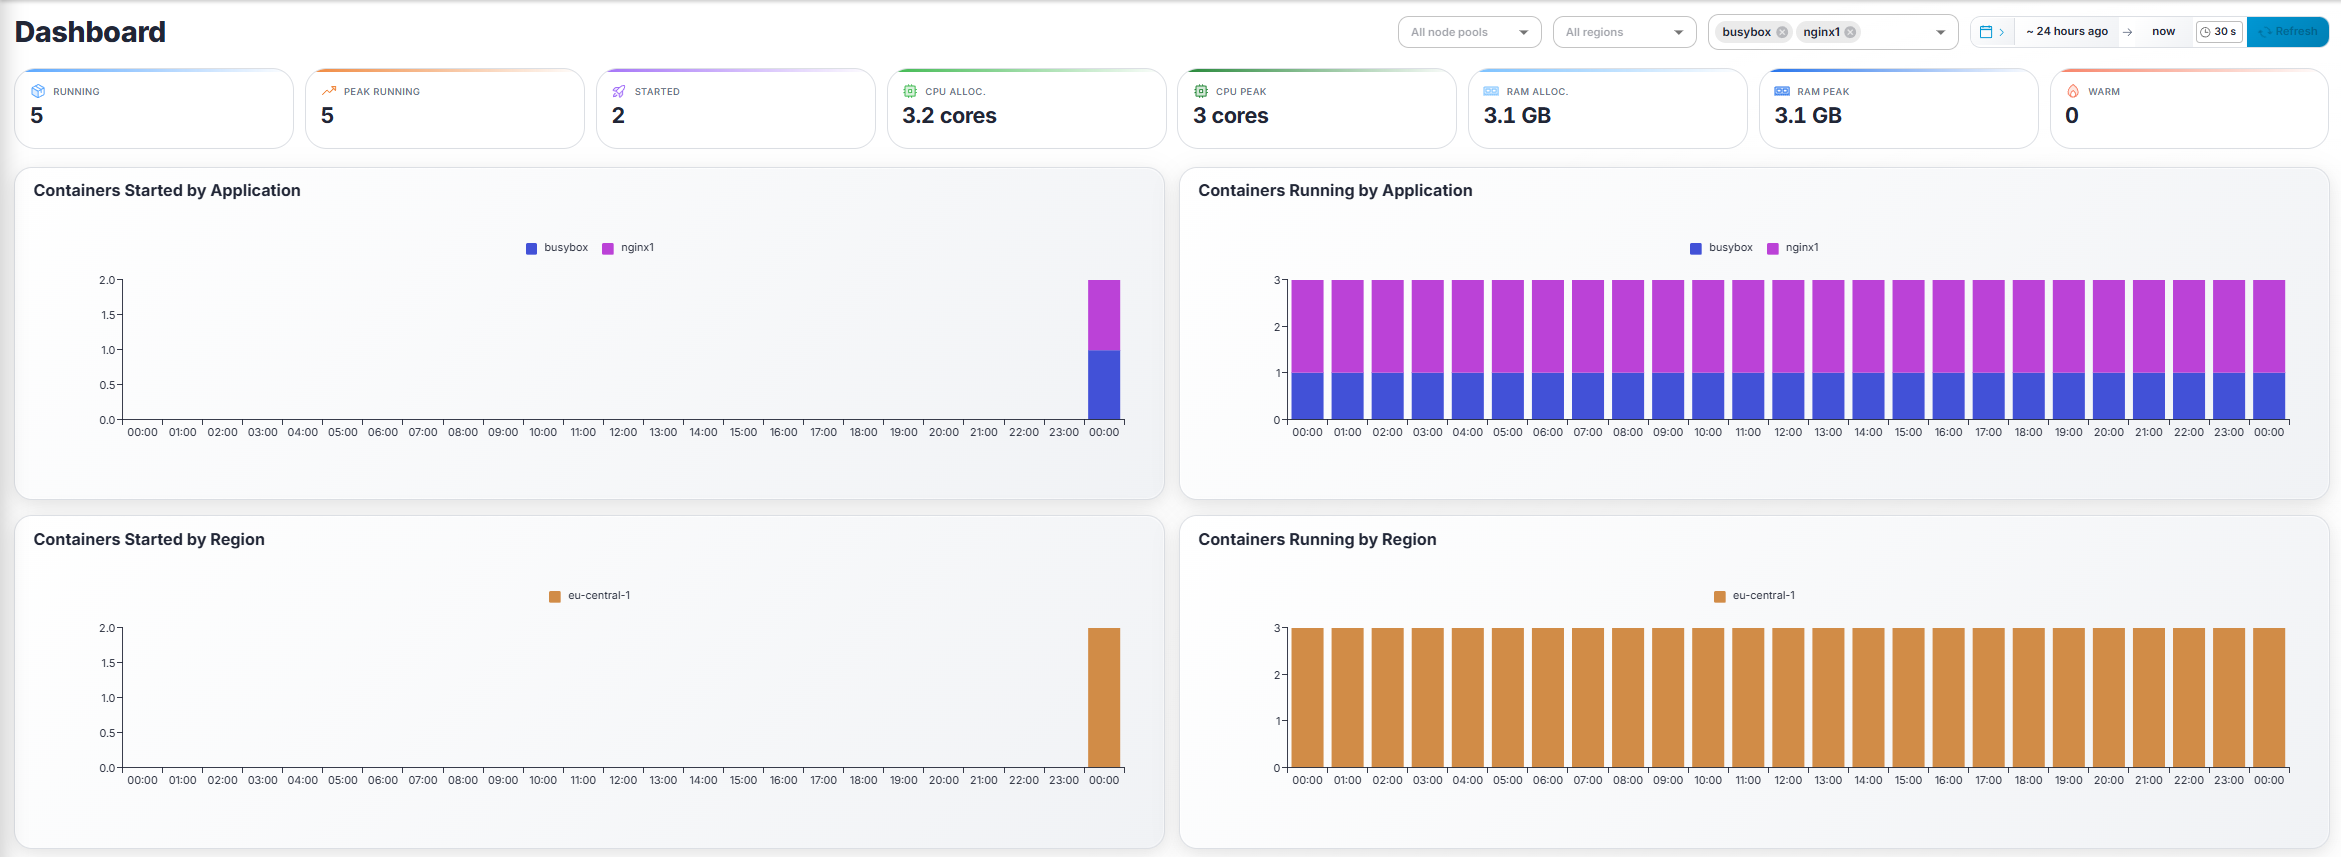
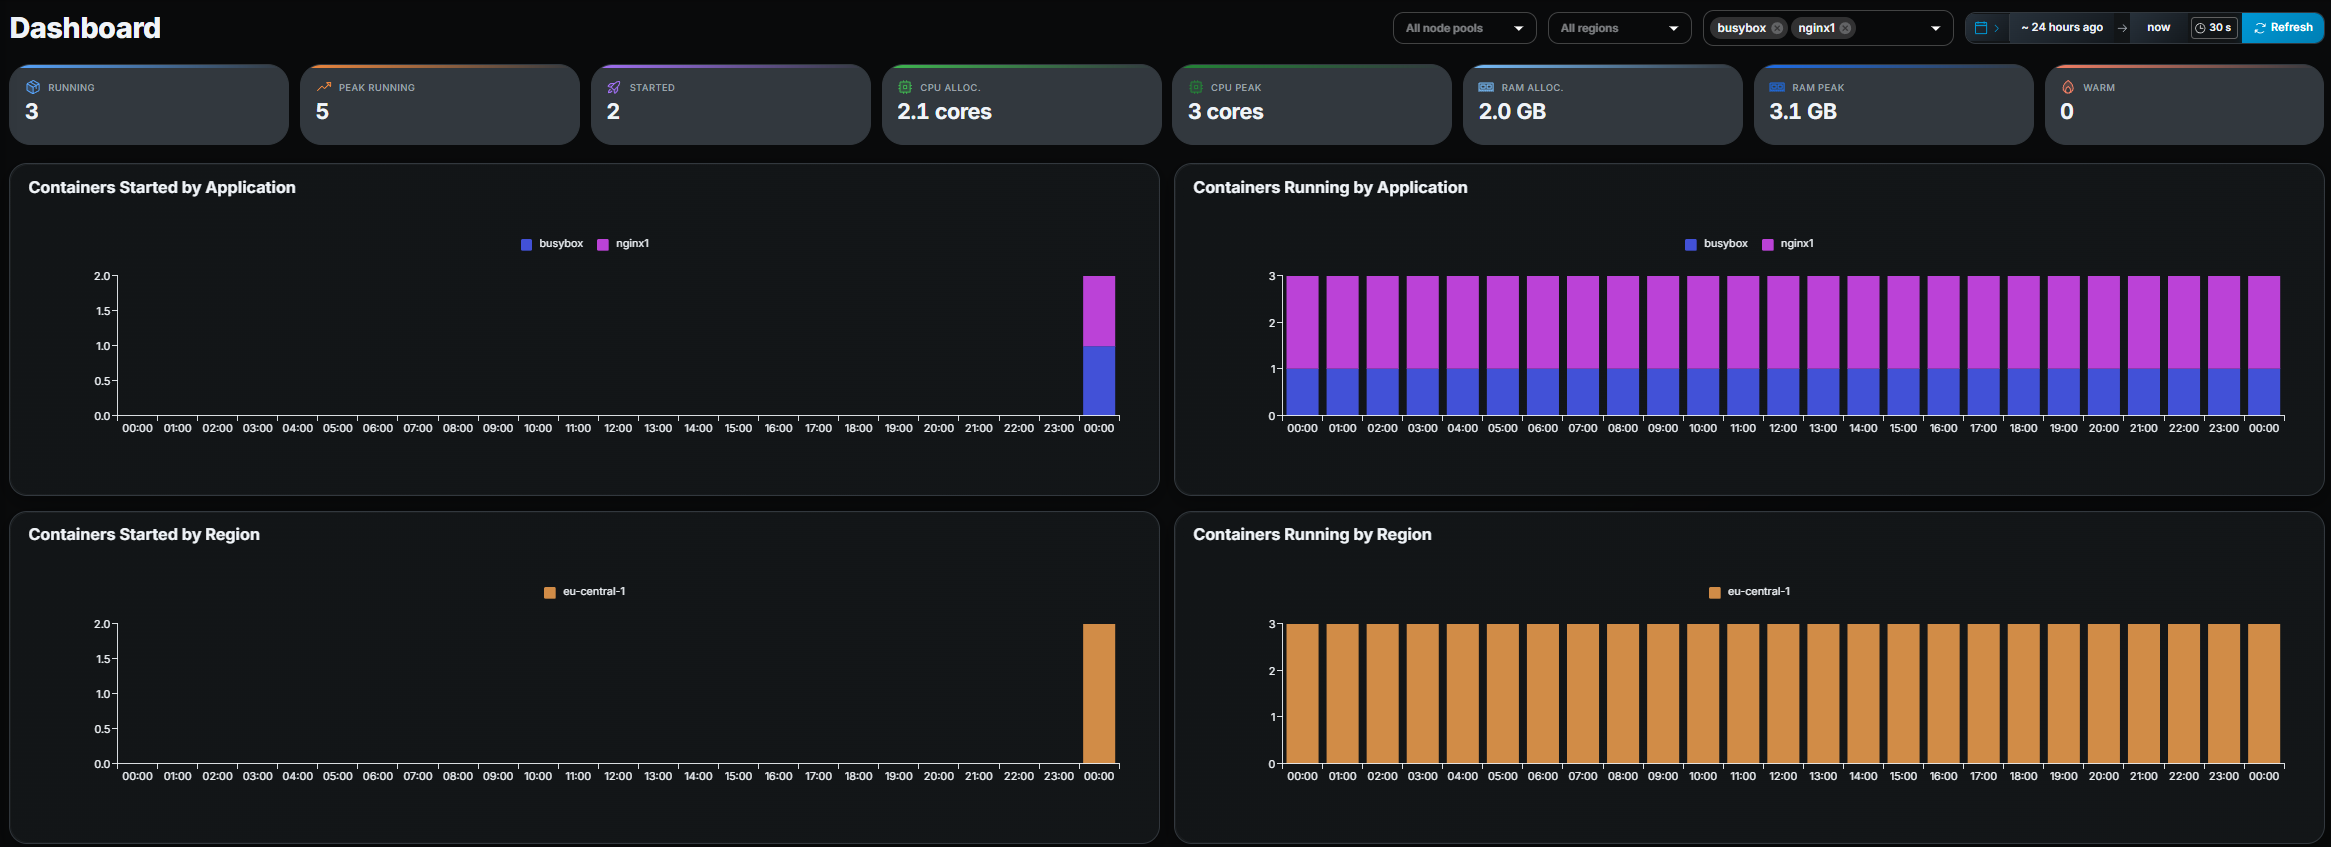
Step 2 — Explore the dashboard
Section titled “Step 2 — Explore the dashboard”Take a moment to orient yourself:
- The sidebar on the left is your main navigation. The items you see depend on your role’s permissions.
- The Dashboard page shows summary metrics (running containers, CPU / RAM allocation, warm containers) and time-series charts.
- The date range picker in the top-right lets you change the time window. Try clicking a quick preset like Last 7 days to see if there is any historical data.
Step 3 — Create an application
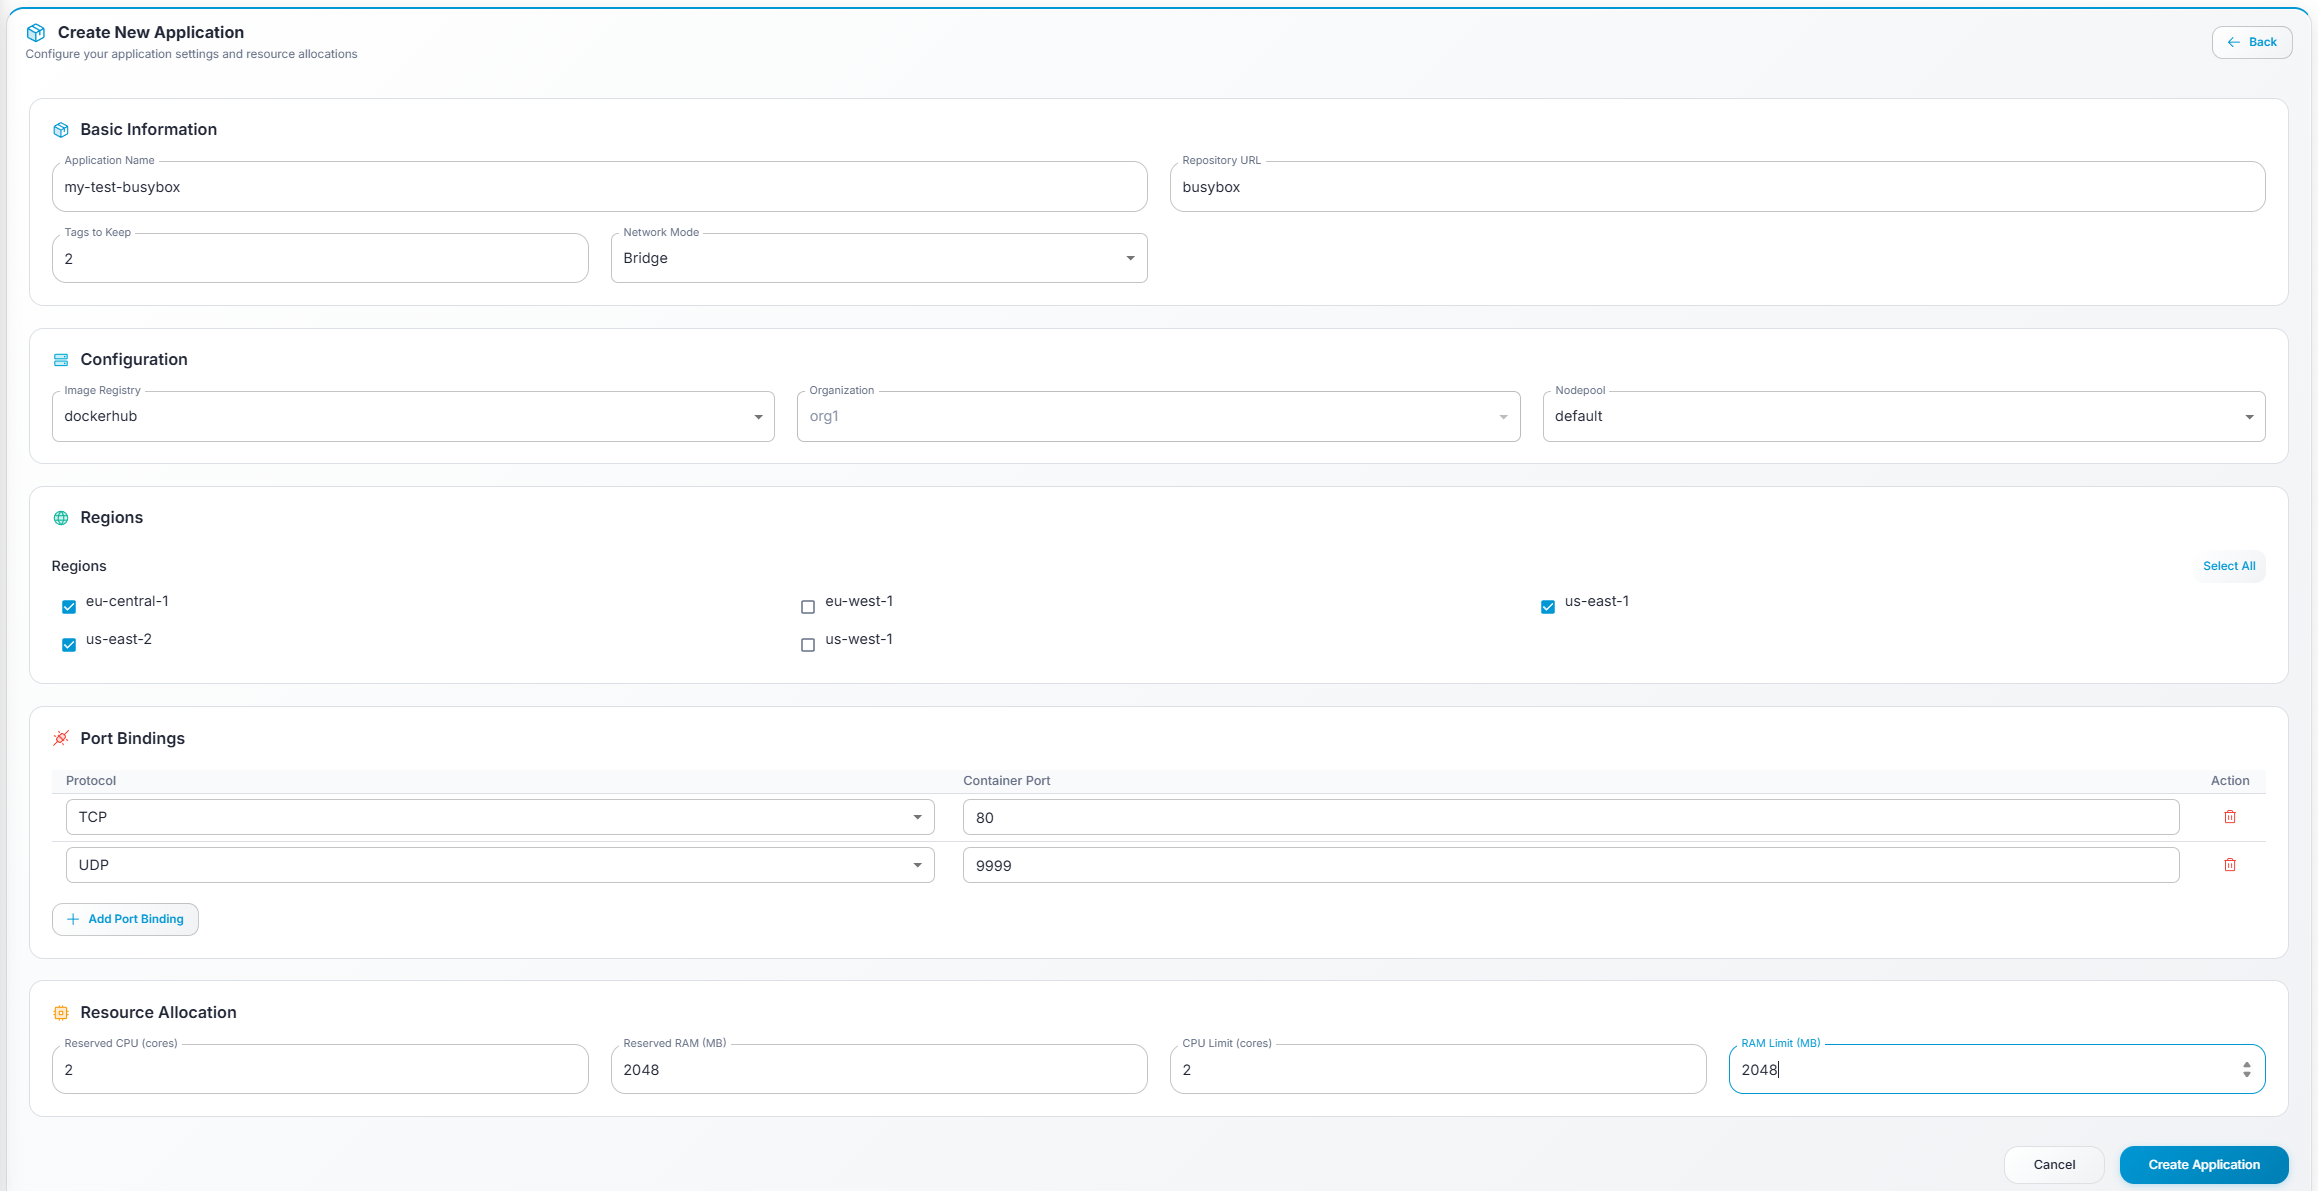
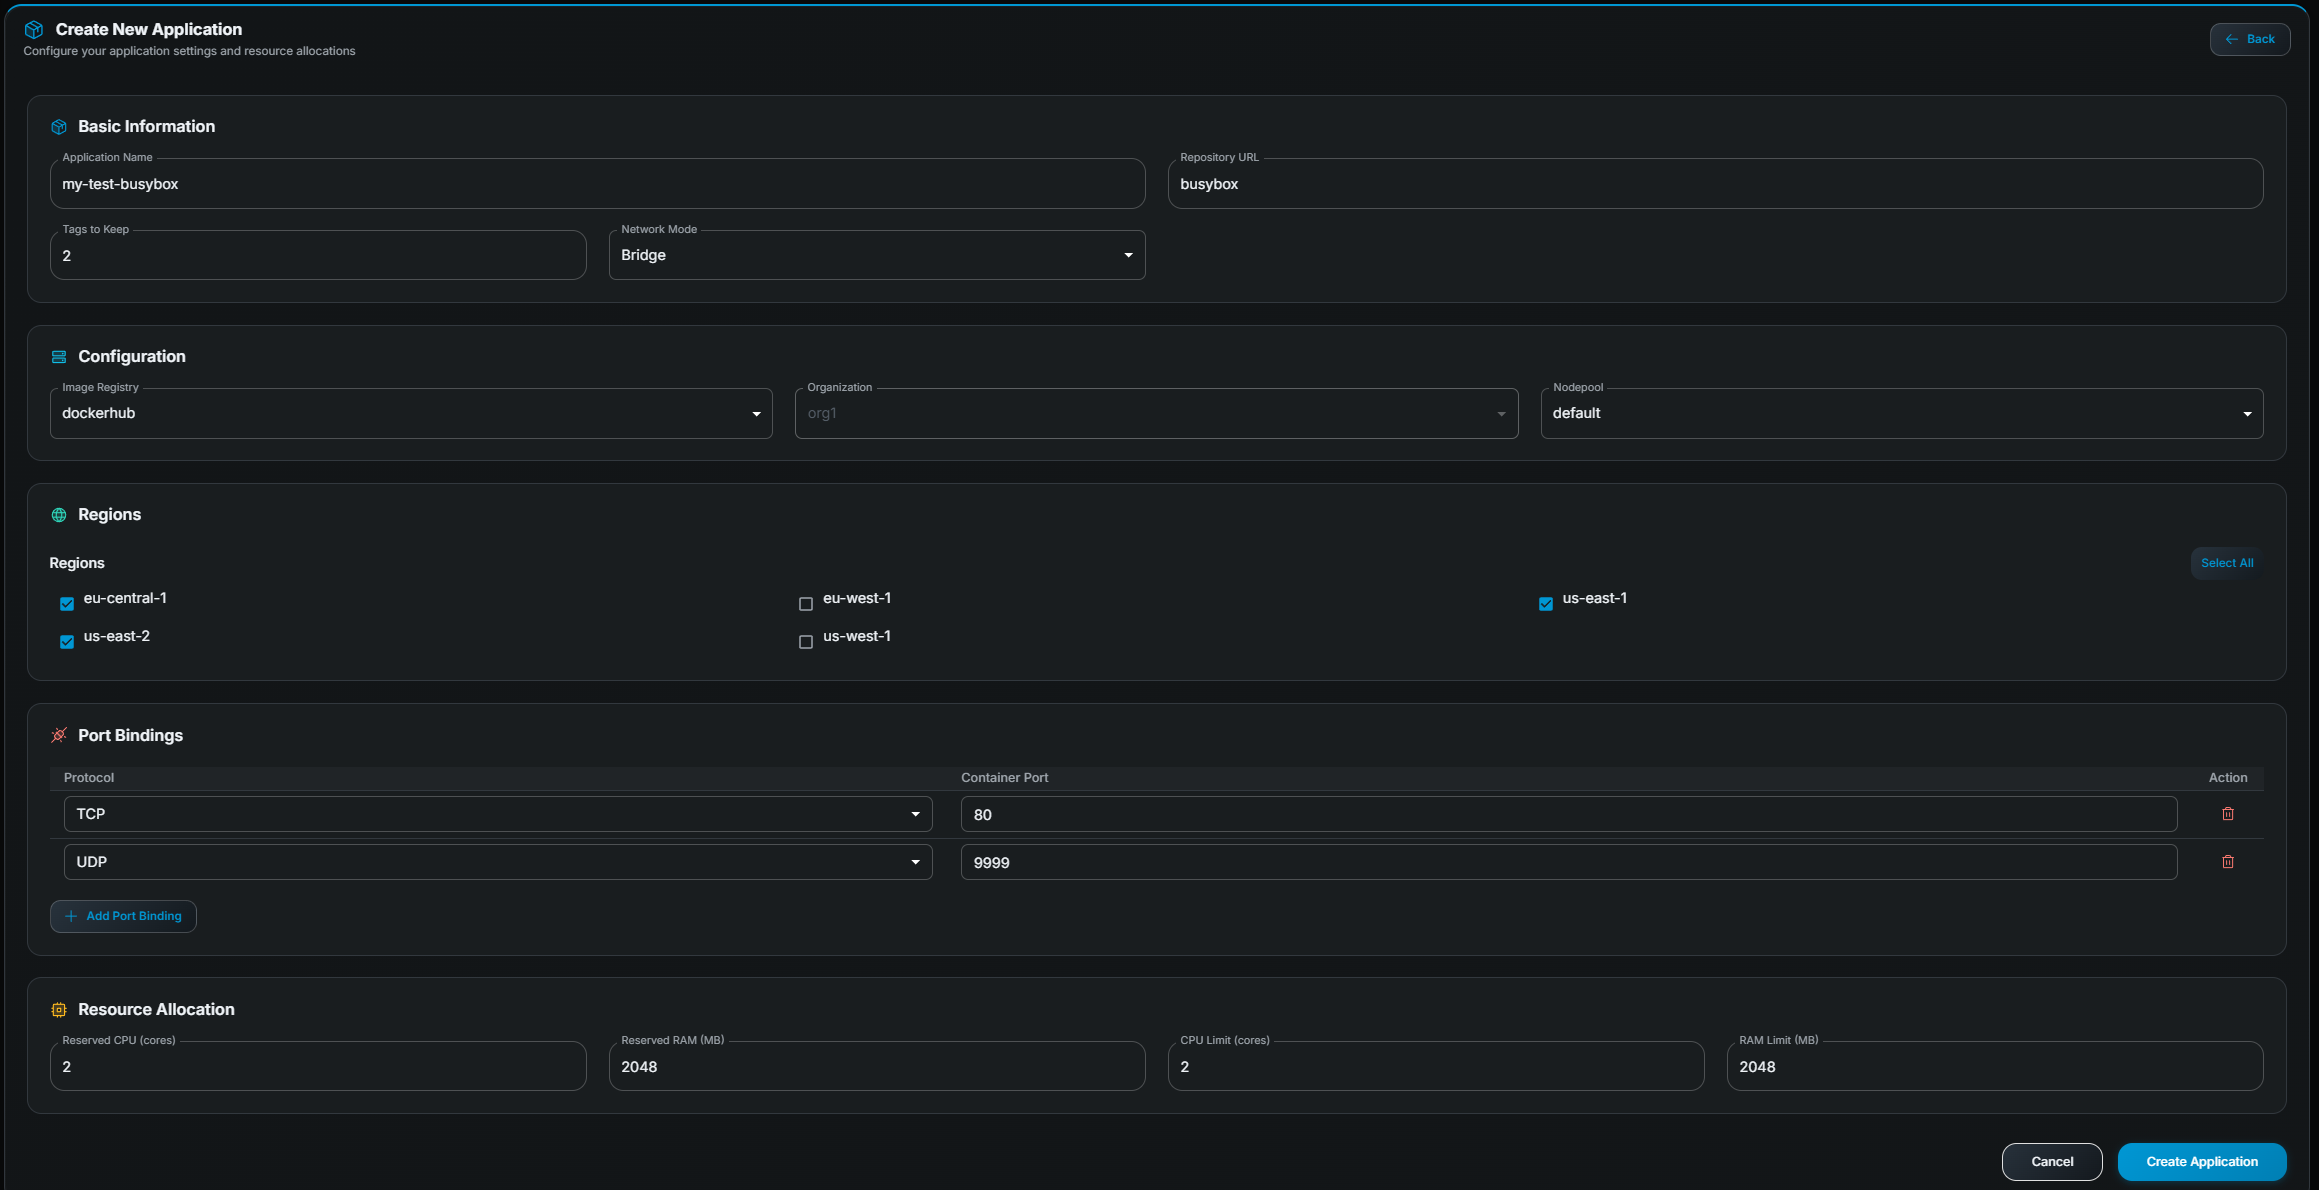
Section titled “Step 3 — Create an application”An application represents a deployable game-server image and its configuration (resources, regions, ports, etc.).
- Navigate to Applications in the sidebar.
- Click the Add button (top-right).
- Fill in the form:
| Field | What to enter |
|---|---|
| Name | A unique, descriptive name (e.g. my-game-eu). |
| Repository | Your Docker Hub repository path (e.g. mygame/server). |
| Tags to keep | How many image tags to retain on nodes. Recommended: 2 (keeps the current and previous version for quick rollback). |
| Network mode | host (container shares the node’s network stack — typical for game servers) or bridge (isolated network). |
| Node pool | Select the node pool your containers should run on. If unsure, ask your administrator. |
| Regions | Select one or more regions where containers may be started. |
| Port bindings | Click Add Port to define each port your server exposes. Set the protocol (TCP or UDP) and container port (1–65535). |
| Reserved CPU | Minimum CPU cores guaranteed to each container. |
| CPU Limit | Maximum CPU cores a container may use. |
| Reserved RAM | Minimum RAM (MB) guaranteed to each container. |
| RAM Limit | Maximum RAM (MB) a container may use. |
- Click Save.
Verify it worked
Section titled “Verify it worked”Your new application now appears in the Applications table. Verify the repository, CPU/RAM, and port settings are correct before proceeding. If anything looks wrong, click Edit (pencil icon) on the row to fix it.
Step 4 — Get your image tag loaded
Section titled “Step 4 — Get your image tag loaded”The application you just created points to a Docker Hub repository, but no image
version has been selected yet. A tag is a specific Docker image version
(e.g. v1.2.3 or latest). Before a container can start, the image must be
pulled onto nodes.
There are three ways to make this happen:
Option A — Webhook auto-pull (recommended)
Section titled “Option A — Webhook auto-pull (recommended)”If the Docker Hub webhook is configured (see step 1), pushing a new image to your repository automatically triggers the orchestrator to pull the image. You don’t need to do anything in the admin panel.
- Push a new image tag to Docker Hub:
Terminal window docker push mygame/server:v1.2.3 - Open the Tags page in the admin panel.
- Within a few moments the new tag appears under your application with a Preloading status.
- Wait for the status to change to Ready (the page auto-refreshes every 10 seconds).
Option B — Update Tags from the Applications page
Section titled “Option B — Update Tags from the Applications page”Use this when you want to pull the latest tag for one or more applications.
- Go to Applications.
- Select one or more applications using the checkboxes.
- Click Update Tags in the toolbar that appears.
- A dialog shows each application’s current tag and the latest available tag on Docker Hub.
- Click Update Tags to pull the new tags.
- Check the Tags page to monitor the loading progress.
Option C — Add a tag manually from the Tags page
Section titled “Option C — Add a tag manually from the Tags page”Use this when you want to load a specific (non-latest) tag.
- Go to Tags.
- Find the application card.
- Click Add Tag (right side of the card).
- A modal lists all tags available in the Docker Hub registry, with search, pushed date, size, and digest.
- Select the desired tag and click Confirm.
- The tag appears in the card with a Preloading status. Wait for it to become Ready.
Step 5 — Test-start a container
Section titled “Step 5 — Test-start a container”Once at least one tag shows Ready, you can start a container to verify your setup is working. This is a manual test — in production, your sessions will be started via the API.
- Navigate to Active Containers.
- Click the Start button (top-right).
- In the dialog, fill in the required fields:
- Application — The application you created.
- Region — Where to run the container.
- Environment variables (optional) — Key-value pairs to inject.
- Arguments (optional) — Command-line arguments.
- Labels (optional) — Key-value metadata.
- Click Submit.
- The container appears in the table. It may briefly show Starting before transitioning to Running.
Step 6 — Monitor your container
Section titled “Step 6 — Monitor your container”- In Active Containers, click the row of your running container.
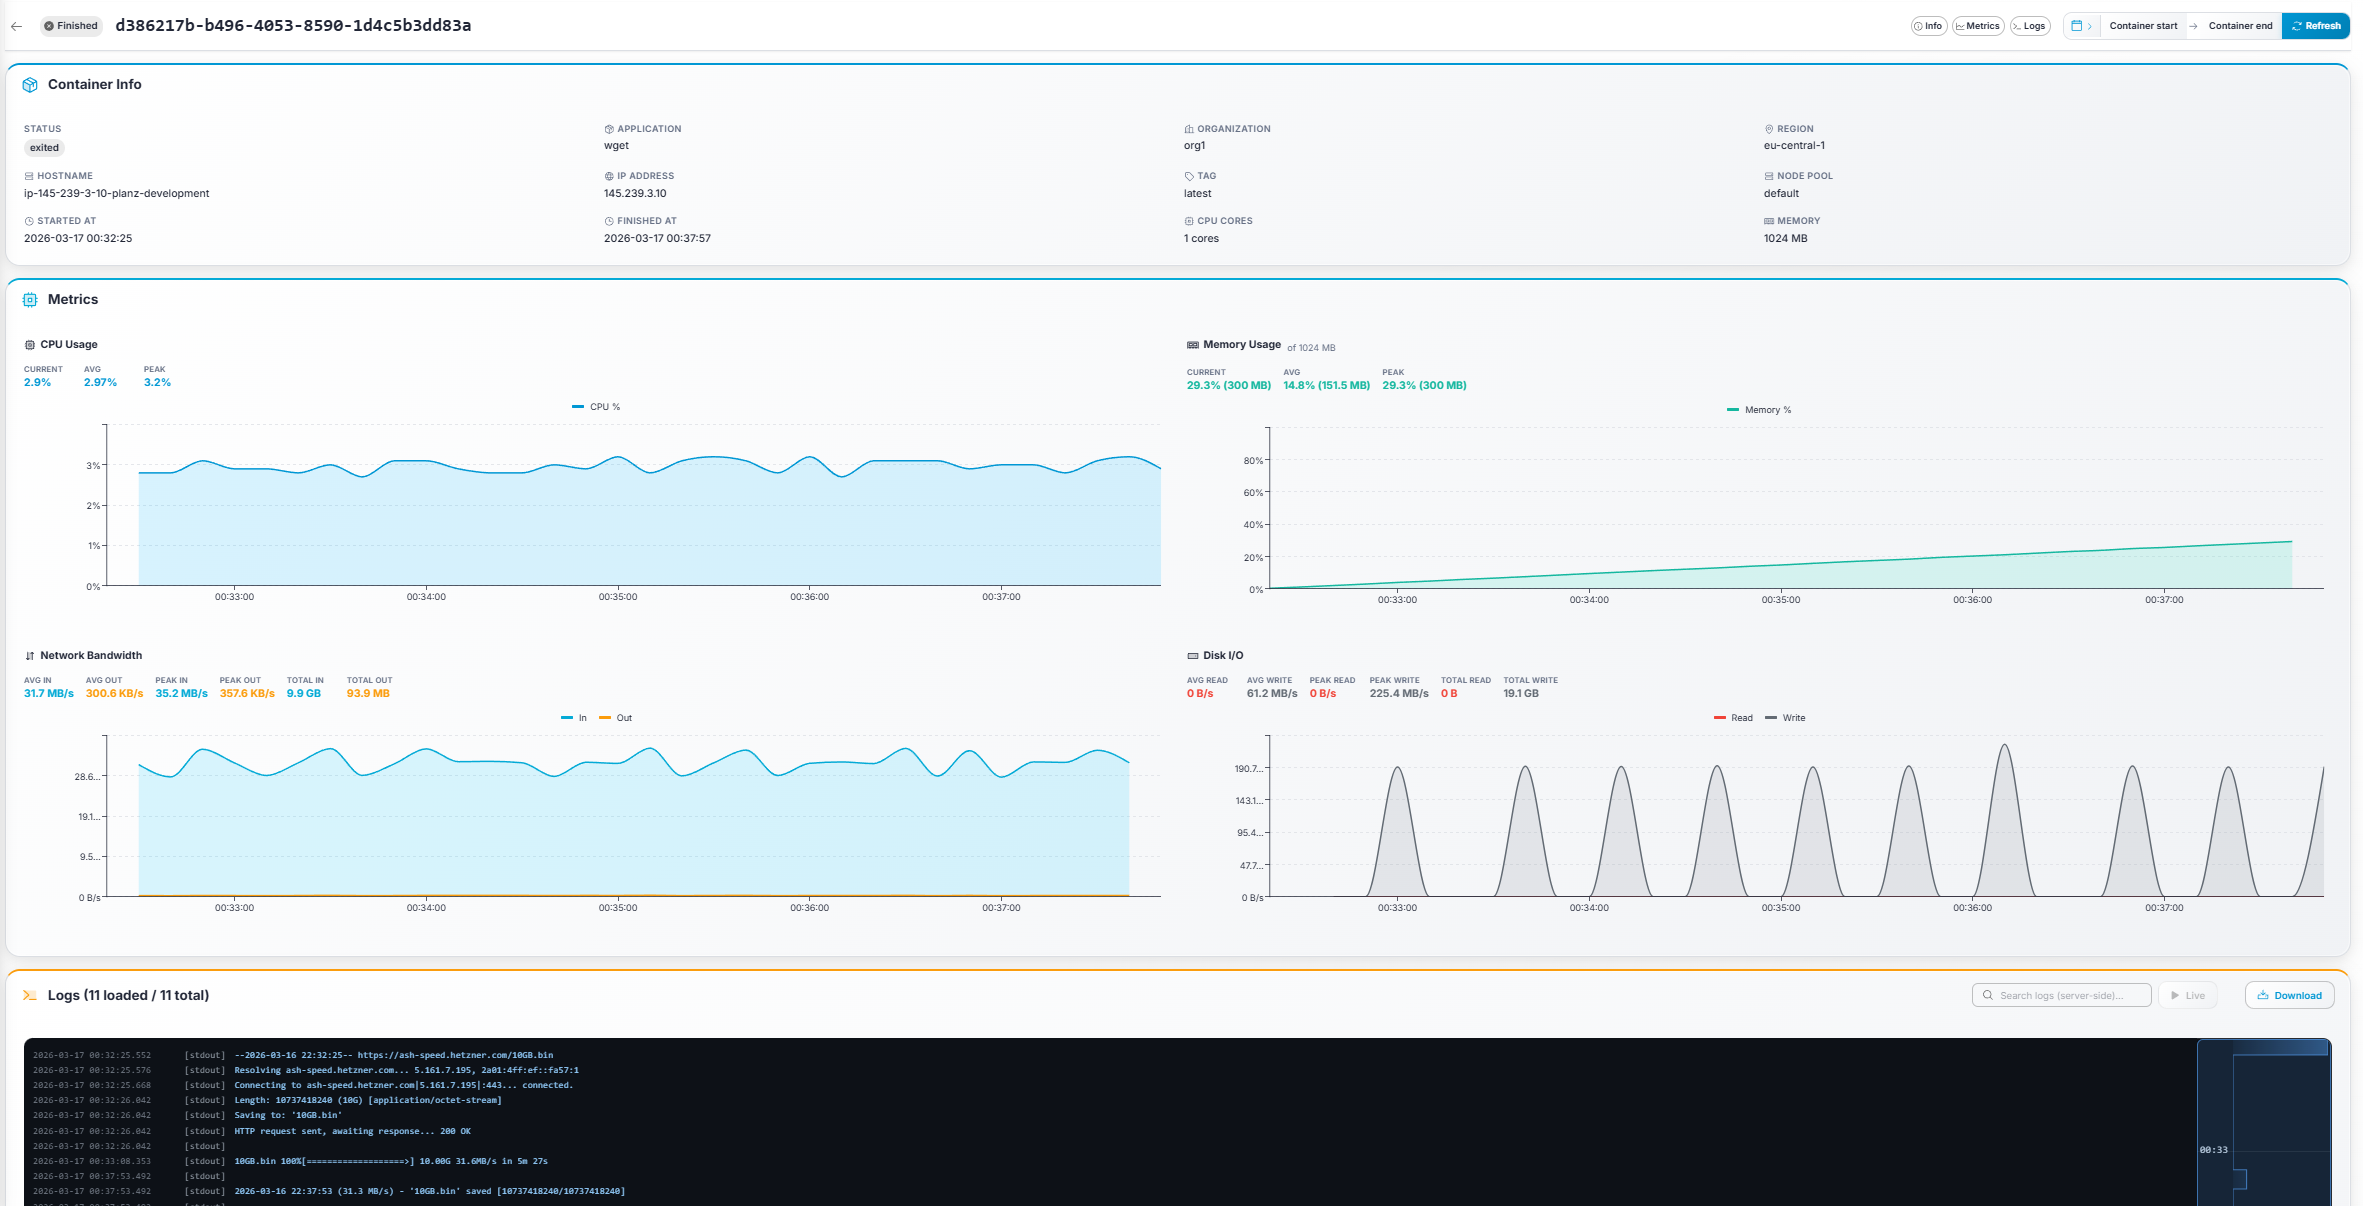
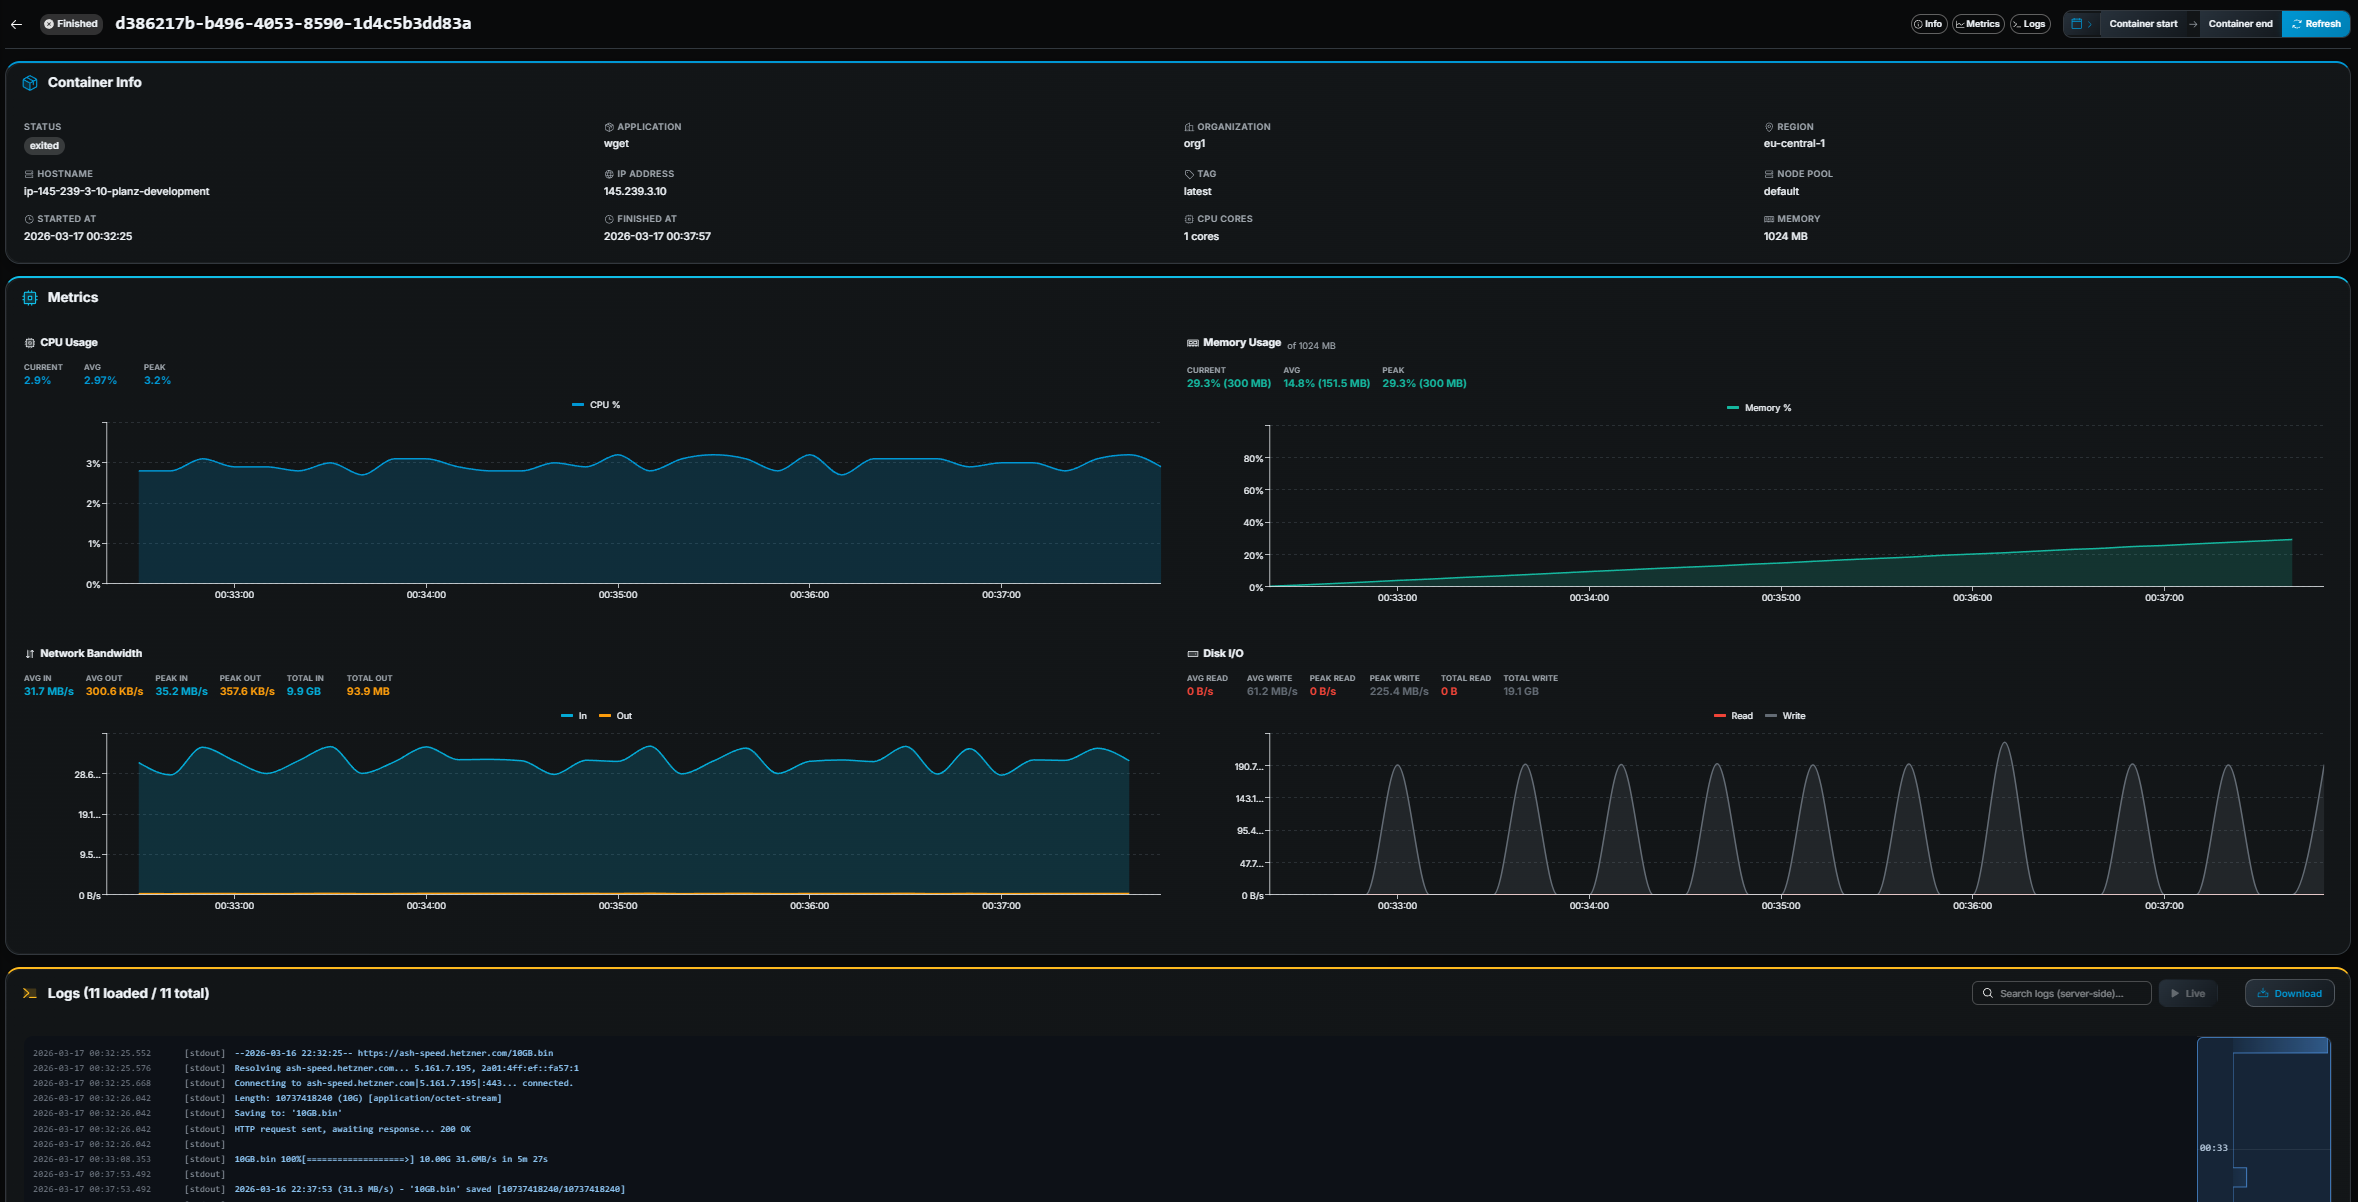
- You are taken to the Container Details page.
What you can do here
Section titled “What you can do here”| Section | What it shows |
|---|---|
| Info | Container metadata: application, region, hostname, IP, ports, tag, CPU/RAM, start time. |
| Metrics | Live line charts for CPU, Memory, Network (in/out), and Disk I/O. Each chart shows current, average, and peak values. |
| Logs | Real-time container logs with full ANSI color support. |
Use the section chips in the sticky header to jump between Info, Metrics, and Logs.
Useful log features
Section titled “Useful log features”- Search — Type in the search field to filter logs server-side.
- Live tail — Click ▶ Tail to stream new log lines in real time.
- Download — Click Download to save the complete log as a
.txtfile. - Histogram minimap — The small bar chart above the log panel shows log density over time.
Stopping the container
Section titled “Stopping the container”When you’re done, go back to Active Containers, click Stop on the container row, and confirm.
Next steps
Section titled “Next steps”You’ve completed the basic onboarding. Here are some features to explore next:
- Warm Pools — Pre-start containers so they are ready for instant player allocation. Great for reducing wait times.
- Bulk operations — Use Mass Edit and Update Tags to manage multiple applications at once.
- Containers History — Review past containers and investigate issues by inspecting historical metrics and logs.
- Dashboard filters — Use application, region, and node pool filters combined with the date range picker to build custom operational views.
- Profile — Change your password at any time.
- Orchestrator API — Integrate container management into your own systems programmatically.
- Start with the API — Want to automate container management? Learn how to launch sessions programmatically.
If you run into issues, check the Troubleshooting section of the User Manual or contact your administrator.